ようへい

2012年4月30日月曜日

4/30 Android ニュースひとまとめ

 Androidスマートフォンを使っていて、動きがもっさりしている、反応が鈍いなど動作速度に不満を抱いている人は多いだろう。動作の重さを根本的に解決するのは難しいが、設定を変えるだけで少し改善させることができる。
アニメーション効果をオフにする
よく使うアプリをホームに登録、使わないアプリは消す
フォルダを使ってアイコンを整理する
アプリ一覧画面をカスタマイズする
起動しているアプリを終了させる
不要なアプリはアンインストールする
画面の自動回転をオフにする
通常利用するアプリの設定を変える
Androidスマホを高速化する即効ワザ - デジタル - 日経トレンディネット
http://trendy.nikkeibp.co.jp/article/column/20120427/1040676/
Android使っている人は試してみてはどうでしょうか。
個人的には、タスクキラー系のアプリはオススメしませんが。
タスクキラーでkillしても、サービスとして起動しているアプリは、killしても起動してくるので、killする度にアプリが起動することになり、マシン負荷、バッテリー消費を招きます。
またAndroidはLinux系OSなので、標準のタスクキラー(OOM Killer)を搭載しているため、OS側でメモリ消費が激しいバックグラウンドアプリ等を自動でkillしてくれます。
関連記事

2012年4月27日金曜日

4/27 Android ニュースひとまとめ

Googleが提供する日本語IME、「Android版Google日本語入力」がアップデートされた。更新によりバージョンは「1.4.1019.3」となる。
辞書の更新や起動時間の短縮を含む、各種変更点は下記の通りとなっている。

 インストールサイズが 6.6 MB 減少しました(19.1 MB から 12.5 MB)。
 辞書を更新
 予測変換の候補の表示順を改善し、入力した読みに対応する候補が優先されない傾向を抑制
 起動時間を短縮
 ケータイ配列でひらがなを入力しているときに、そのキーに対応する数字も候補に表示するようにしました。例) 「あかあか」で「1212」が候補に表示
 ひらがなモード時にも半角スペースを入力することができるようになりました。
 フリック入力時にフリック操作で濁点、半濁点、小文字の入力ができるように
 Android2.1端末においてシステム設定経由で設定画面を開くことができなかった問題を修正
辞書の更新、起動時間の短縮など多数改善が含まれる「Android版Google 日本語入力」のアップデートが配信へ | APPGIGA!!(アプギガ)
http://plus.appgiga.jp/ky777/2012/04/26/19962/
まだベータ版ですが、なかなか使いやすい。
しかし、いいかげんユーザ辞書機能くらい搭載して欲しい・・・。
Google 日本語入力 - Google Play の Android アプリ
https://play.google.com/store/apps/details?id=com.google.android.inputmethod.japanese
 しかしながら、JXD社はボタンのデザインでトラブルに陥る可能性がある。コントローラーのアクションボタンに、三角、丸、バツ、四角のマークが用いられているが、このボタンはソニーの登録商標なのだ。

 さらにS5110は、『NINTENDO64』『ゲームボーイアドバンス』および『メガドライブ』のシミュレーターへの対応が売りになっている。『テトリス』や『ソニック・ザ・ヘッジホッグ』のROMから、『Google Play』で入手できる『Angry Birds』の正式版まで、S5110では幅広くプレイできるようだ。

 Androidは『Ice Cream Sandwich』で、ディスプレイは5インチで800×480の静電容量タッチ画面だ。HDMIポートを使って、ゲームやAndroidアプリを高精細テレビ(HDTV)の大画面に映し出すこともできる。プロセッサーは『Amlogic M3』で、512MBのDDR RAMを搭載する。0.3メガピクセルの背面カメラ、USB 2.0ポート、MicroSDスロット、音声用のミニジャックを備えている。Wi-Fi接続もあり、S5110はかなり素晴らしいゲーム機のようだ。

 残念ながら、JXD社のサイトにはS5110を購入できる方法が掲載されていない。WIREDでは、同社の中国オフィスとイラン・オフィスにメールを送ったが、これまでに返事は来ていない(ソニーにも問い合わせを出したが、まだ返答がない)。
PSPにそっくりなAndroidゲーム機『JXD』 - MSN産経ニュース
http://sankei.jp.msn.com/wired/news/120427/wir12042711580000-n1.htm
ゲームしやすそうだけどアウトでしょ。
エミュ対応を売りにしてるあたりも国内では物議をかもしそう。
何よりデザインをパクっちゃダメでしょ。
ソニーが4月下旬と予告していたソニータブレット S / P システムソフトウェアアップデートの延期を発表しました。理由は「ソフトウェアの開発に予定よりも時間を要することが判明したため」。新たな提供日は未定で、「鋭意開発を行っておりますので、詳細が確認でき次第、改めてご連絡をさせていただきます」。

ソニータブレットのシステムソフトウェアアップデートは、Androidプラットフォームが 4.0.3 に更新されるほか、3種の「スモールアプリ」など独自のアップデートも含む内容がアナウンスされていました。日本と同時期の4月下旬が予告されていた米国および海外の一部地域ではすでにアップデートの提供が始まっています。
ソニータブレットのAndroid 4.0アップデート延期、提供日未定へ - Engadget Japanese
http://japanese.engadget.com/2012/04/27/s-p-android-4-0/
こんなことやってたら、2011年にソニエリから販売されたスマフォのICS対応なんて程遠いな・・・。
対応してくれないよりは良いんだけどさ。
関連記事

2012年4月26日木曜日

[Android アプリレビュー] タワーディフェンス: Lost Earth

情報
タワーディフェンス: Lost Earth
6種類のユニットを選択
タワーディフェンス: Lost Earth
ハードクリアは課金前提
タワーディフェンス: Lost Earth
ストーリーあり
タワーディフェンスゲーム。
無料ながら、非常に良くできている。
何種類かのユニットから、マップ毎に6種類のユニットを選択して攻略していく。
後半は課金して強化しないと攻略が困難というのがネック。
基本、フィールド内でのユニット強化は可能だが、Robo Defense等のゲームに見られるマップを攻略したポイントでユニットの基礎能力を上げたりという要素は無い。
その代わり、ユニットの基礎能力を上げたりする効果を持つアイテムを攻略した際等に得られるポイントを消費して使用する事が可能。
しかし、1マップでしか効果が無く、マップを攻略できたかどうかにかかわらず、効果は消える。
これにより、後半はポイントを貯めるためのマゾゲーと化す。
課金前提でないゲームレベルにしてほしかった。
やり込み要素は少なめ。
攻略
どのタワーディフェンスゲームでもそうだが、序盤はレーザーを置けばなんとか凌げる。
しかし、中盤以降は、レーザーでは殆ど敵の体力を削る事が出来なくなってくる。
こうなったら、レーザーは破棄して、より強力なユニットに置き換える必要がある。
マップをプレイする前に、そのマップにどの敵が出るのか確認できる。
1種類だが、タワーが自動でターゲッティングしてくれない敵がおり、敵をタップしてターゲットを捕捉する必要がある。
この敵が出てきたときは、一時停止しながら進めれば問題なく撃破できる。
倍速にして放置したりしないように。
タワーディフェンス: Lost Earth
動作
アプリケーションの安定性
価格
コストパフォーマンスが良いかどうか
関連記事

Hello, L10N

Hello, L10N | Android Developers
http://developer.android.com/intl/ja/resources/tutorials/localization/index.html ローカライズ(多言語対応)のチュートリアルです。
HelloL10Nというプロジェクトを作成します。
res/layout/main.xmlを開き、以下のように変更します。
<?xml version="1.0" encoding="utf-8"?>
<LinearLayout xmlns:android="http://schemas.android.com/apk/res/android"
    android:orientation="vertical"
    android:layout_width="match_parent"
    android:layout_height="match_parent"
    >
<TextView
    android:layout_width="match_parent"
    android:layout_height="wrap_content"
    android:gravity="center_horizontal"
    android:text="@string/text_a"
    />
<TextView
    android:layout_width="match_parent"
    android:layout_height="wrap_content"
    android:gravity="center_horizontal"
    android:text="@string/text_b"
    />
<Button
    android:id="@+id/flag_button"
    android:layout_width="wrap_content"
    android:layout_height="wrap_content"
    android:layout_gravity="center"
    />
</LinearLayout>
res/values/strings.xmlを開き、以下のように変更します。
<?xml version="1.0" encoding="utf-8"?>
<resources>

    <string name="hello">Hello World, HelloL10NActivity!</string>
    <string name="app_name">HelloL10N</string>
    <string name="text_a">Shall I compare thee to a summer"'"s day?</string>
    <string name="text_b">Thou art more lovely and more temperate.</string>
    <string name="dialog_title">No Localisation</string>
    <string name="dialog_text">This dialog box"'"s strings are not localised. For every locale, the text here will come from values/strings.xml.</string>

</resources>
チュートリアルページからflag.pngをダウンロードし、res/drawable/flag.pngとして保存します。
HelloL10NActivity.javaを開き、以下のように変更します。
package jp.blogspot.logroid.helloL10N;

import android.app.Activity;
import android.app.AlertDialog;
import android.content.DialogInterface;
import android.os.Bundle;
import android.view.View;
import android.widget.Button;

public class HelloL10NActivity extends Activity {
    /** Called when the activity is first created. */
    @Override
    public void onCreate(Bundle savedInstanceState) {
        super.onCreate(savedInstanceState);
        setContentView(R.layout.main);

        // assign flag.png to the button, loading correct flag image for current locale
        Button b;
        (b = (Button)findViewById(R.id.flag_button)).setBackgroundDrawable(this.getResources().getDrawable(R.drawable.flag));

        // build dialog box to display when user clicks the flag
        AlertDialog.Builder builder = new AlertDialog.Builder(this);
        builder.setMessage(R.string.dialog_text)
            .setCancelable(false)
            .setTitle(R.string.dialog_title)
            .setPositiveButton("Done", new DialogInterface.OnClickListener() {
                public void onClick(DialogInterface dialog, int id) {
                dialog.dismiss();
                }
            });
        final AlertDialog alert = builder.create();

        // set click listener on the flag to show the dialog box
        b.setOnClickListener(new View.OnClickListener() {
            public void onClick(View v) {
                alert.show();
            }
            });
    }
}
実行します。
この時点では、ローカライズされていない状態です。
ここからローカライズを行います。
res/values/を右クリックし、Android XMLファイルを追加します。
ファイル名をstrings.xmlとして、次へをクリックします。
Available QualifiersからLanguageを選択し、->ボタンをクリックします。
言語にdeを入力し、完了をクリックします。
同様に、fr、jaのstrings.xmlを作成します。
それぞれのファイル内容は以下の通り設定します。
res/values-de/strings.xml
<?xml version="1.0" encoding="utf-8"?>
<resources>
    <string name="app_name">Hallo, Lokalisierung</string>
    <string name="text_a">Soll ich dich einem Sommertag vergleichen,</string>
    <string name="text_b">Der du viel lieblicher und sanfter bist?</string>
</resources>
res/values-fr/strings.xml
<?xml version="1.0" encoding="utf-8"?>
<resources>
    <string name="app_name">Bonjour, Localisation</string>
    <string name="text_a">Irai-je te comparer au jour d\'été?</string>
    <string name="text_b">Tu es plus tendre et bien plus tempéré.</string>
</resources>
res/values-ja/strings.xml
<?xml version="1.0" encoding="utf-8"?>
<resources>
    <string name="text_a">あなたをなにかにたとえるとしたら夏の一日でしょうか?</string>
    <string name="text_b">だがあなたはもっと美しく、もっとおだやかです。</string>
</resources>
チュートリアルのページから画像をダウンロードし、各フォルダに保存します。
実行します。
一旦ホームに戻り、アプリ一覧からCustom Localeをタップします。
セットしたいロケールをロングタップし、言語を設定します。
HelloL10Nを起動し、セットした言語で表示されることを確認します。
関連記事

2012年4月25日水曜日

4/25 Android ニュースひとまとめ

Dropbox や マイクロソフト SkyDrive が慌ただしく機能追加やリニューアルをしていた理由のひとつ、Google 版 クラウドストレージ Google Drive がついに正式発表を迎えました。Google ドライブは、従来の Google Docs を大幅に拡大・リニューアルしたサービス。Google ドキュメントの作成・ブラウザ上編集・共有といった機能を含み、なおかつ:

・無料で5GB の容量 (旧 Google Docs では自前アップロードファイル1GBまで)
・月2.49ドルで+25GB、最大16TBまでの追加容量プラン。
・1ファイルの最大サイズは10GB。
・Windows / Mac 用クライアントアプリでローカルフォルダと同期。
・Android アプリでオフラインアクセス、アップロード。iOS版は近日公開。
・高度な Google 検索統合。
・SDK公開。サードパーティーアプリへの統合をサポート。
Google Drive 正式発表:無料5GB、デスクトップ同期、画像認識やOCR検索 - Engadget Japanese
http://japanese.engadget.com/2012/04/24/google-drive-5gb-ocr/
Googleからやっとクラウドストレージが発表となりました。
GoogleということでAndroidと親和性が良いのは間違いないですね。
こちらからインストールしておきましょう。
Google ドライブ - Google Play の Android アプリ
https://play.google.com/store/apps/details?id=com.google.android.apps.docs 気になる他のクラウドストレージサービスとの比較はこちら
Google Drive 対 Dropbox、SkyDrive、iCloud 詳細比較チャート - Engadget Japanese
http://japanese.engadget.com/2012/04/24/google-drive-dropbox-skydrive-icloud/
関連記事

Hello, Views (Web View編)

Web View | Android Developers
http://developer.android.com/intl/ja/resources/tutorials/views/hello-webview.html Webブラウザのチュートリアルです。
HelloWebViewというプロジェクトを作成します。
res/layout/main.xmlを開き、以下のように変更します。
<?xml version="1.0" encoding="utf-8"?>
<WebView  xmlns:android="http://schemas.android.com/apk/res/android"
    android:id="@+id/webview"
    android:layout_width="match_parent"
    android:layout_height="match_parent"
/>
AndroidManifest.xmlを開き、以下のように変更します。
<?xml version="1.0" encoding="utf-8"?>
<manifest xmlns:android="http://schemas.android.com/apk/res/android"
    package="jp.blogspot.logroid.helloWebView"
    android:versionCode="1"
    android:versionName="1.0" >

    <uses-sdk android:minSdkVersion="10" />
    <uses-permission android:name="android.permission.INTERNET"/>

    <application
        android:icon="@drawable/ic_launcher"
        android:label="@string/app_name" >
        <activity
            android:name=".HelloWebViewActivity"
            android:label="@string/app_name"
            android:theme="@android:style/Theme.NoTitleBar">
            <intent-filter>
                <action android:name="android.intent.action.MAIN" />

                <category android:name="android.intent.category.LAUNCHER" />
            </intent-filter>
        </activity>
    </application>

</manifest>
実行します。
URLも何も指定していないので空ページが表示されます
HelloWebViewActivity.javaを開き、以下のように変更します。
package jp.blogspot.logroid.helloWebView;

import android.app.Activity;
import android.os.Bundle;
import android.view.KeyEvent;
import android.webkit.WebView;
import android.webkit.WebViewClient;

public class HelloWebViewActivity extends Activity {
    WebView mWebView;

    /** Called when the activity is first created. */
    @Override
    public void onCreate(Bundle savedInstanceState) {
        super.onCreate(savedInstanceState);
        setContentView(R.layout.main);

        mWebView = (WebView) findViewById(R.id.webview);
        mWebView.getSettings().setJavaScriptEnabled(true);
        mWebView.loadUrl("http://www.google.com");
        mWebView.setWebViewClient(new HelloWebViewClient());
    }

    @Override
    public boolean onKeyDown(int keyCode, KeyEvent event) {
        if ((keyCode == KeyEvent.KEYCODE_BACK) && mWebView.canGoBack()) {
            mWebView.goBack();
            return true;
        }
        return super.onKeyDown(keyCode, event);
    }

    private class HelloWebViewClient extends WebViewClient {
        @Override
        public boolean shouldOverrideUrlLoading(WebView view, String url) {
            view.loadUrl(url);
            return true;
        }
    }

}
実行します。
関連記事

4/24 Android ニュースひとまとめ

ゲームロフトは、iOS/Android用アプリ「SharkDash」において、リリース後、米国、フランス、英国、ドイツ、メキシコ、カナダのApp Storeにて優れたカスタマー評価(5ポイント中4.5ポイント)を得て、有料ゲームトップ5位内に入ったことを発表した。
iOS/Android「SharkDash」有料ゲームトップ5入りを達成|Gamer
http://www.gamer.ne.jp/news/201204240012/
アクションゲームかと思ったらパズルゲームだったんですね。
4/19に公開にしたばかりで、えらい高評価ですね。
余裕出来たらプレイしてみようかな。
SharkDash - Google Play の Android アプリ
https://play.google.com/store/apps/details?id=com.gameloft.android.ANMP.GloftSRHM
MVPenテクノロジーズ株式会社(代表取締役:ケイダー・ヨアブ、本社:東京都港区新橋6-9-2)は、米国EFUN社のnextbookシリーズのAndroidTM OS4.0搭載、タブレット端末7インチ「nextbook(ネクストブック)PREMIUM7」、8インチ「nextbook(ネクストブック)PREMIUM8」と9,7インチ「nextbook(ネクストブック)PREMIUM10の3機種を、MVPenオンラインショップ及びMVPenダイレクト楽天市場店、MVPenダイレクトYahoo!店、ビッダーズ、au oneショッピングモール、mixiモール等、同社運営のダイレクトショップでの販売を開始したことを発表しました。
AndroidタブレットPC nextbook、1万円台のAndroid OS4.0搭載 PREMIUMシリーズを発売 - CNET Japan
http://japan.cnet.com/release/30018612/
1万円台のICS搭載タブレットですか。
気になるスペックは以下。
【機能項目】
■CPU:Cortex A8 1GHz
■メモリー:512MB DDR3
■ハードディスク:Nand Flash 4GB(システム領域含む)
■液晶サイズ:8インチTFT
■液晶解像度:800x600
■タッチパネルタイプ:静電式
■スピーカー:あり
■マイク:あり
■フロントカメラ:あり(200万画素)
■無線LAN:WiFi 802.11b/g/n 対応
■Gセンサー:360°
■3D:未対応
■カラー:「黒色」
■内蔵バッテリー:5,000mAh
 (リチウムバッテリー、WEB閲覧が約5時間使用可能)
 ※ご利用の環境によって異なる場合もあります。
■本体サイズ:約220(W)×152(L) ×10(D)mm
■本体重量:約482g
■インターフェイス
 Mini USB×1/SDカード×1(16GBまで対応)/イヤホンジャック×1/HDMI×1
 リセット×1/DC in×1/

【ソフトウェア】
■OS:Google Android 4.0
■ファームウェア:アンドロイド 4.0
■言語表示:日本語に設定済
■入力方法:simejiアプリで日本語に対応
■アンドロイドマーケット:未対応
 
■標準ブラウザ:対応
■Flash   :未対応
■ビデオ:Video Player
■オーディオ:Audio Player
■電子ブック:Adobe Reader、PDF、EPUB、TXT、FB2、PDB、RTF等「対応」
■EMAIL:メール
■SNS:FACEBOOK、TWITTER「対応」

【対応フォーマット】
※全ての形式の再生を保証するものではありません。
■オーディオ再生:MP3、WAV、OGG、FLAC、APE、AAC等
■ビデオ再生:AVI、3GP、MP4、RM、RMVB、FLV、MKV、MOV、VOB、DAT、WMV等
■画像ビューア:JPEG、BMP、GIF、PNG等

【付属品】
 充電器100~240V×1個/USBコード×1本/化粧箱×1個/ポーチ入れ152(L) mm
あまり見ないCPUですね。
メモリも512MBかぁ
あれ、アンドロイドマーケット:未対応って、Kindle Fireとかみたいに専用端末って事?
購入考えている人は要注意ですよ。
教育機関向けとかですかね。
 ページの戻る/進むやブックマークの表示/追加などの操作は「クイックコントロールメニュー」から行える。画面の左右の端にタッチすると、そこを中心とした扇形のクイックコントロールメニューが現れ、そのまま指をスライドさせることで各種操作を行う仕組み。メニューは7区画に分かれており、それぞれ割り当てる操作をカスタマイズ可能だ。「戻る」「進む」「ブックマーク」「ブックマークに追加」のほか、「更新」「新しいウィンドウ」「ウィンドウを閉じる」「あとで読む」「スピードダイヤルに追加」「検索」「クイックコントロール設定」という操作から好きなものを設定できる。
Androidアプリ「Yahoo!ブラウザー」無料公開、偽サイト警告や扇形メニュー -INTERNET Watch
http://internet.watch.impress.co.jp/docs/news/20120424_528753.html
操作性はなかなか良さそう。
起動速度、ページの表示速度、HTML5の対応状況等どうなんでしょうか?
私はYahoo!という時点であまり使う気にはなりませんけど。
エンジンはオリジナルなのかな?
詳細確認してみようと思います。
関連記事

2012年4月24日火曜日

Hello, Views (Google Map View編)

Google Map View | Android Developers
http://developer.android.com/intl/ja/resources/tutorials/views/hello-mapview.html 事前に Android SDK マネージャーでGoogle APIsをインストールしておきましょう。
また、Google Maps APIのAPI Keyが必要になります。取得していない場合は以下を参照し、取得しておきましょう。
Android Maps API Key 取得方法 - ログろいど
Google APIsをターゲットとした仮想デバイスが作られていない場合は、AVDで作成しておきます。

Part 1: Map Activityの作成

ビルドターゲットを、Google APIs、プラットフォームを2.3.3でHelloGoogleMapsというプロジェクトを作成します。
AndroidManifest.xmlを開き、以下のように変更します。
<?xml version="1.0" encoding="utf-8"?>
<manifest xmlns:android="http://schemas.android.com/apk/res/android"
    package="jp.blogspot.logroid.helloGoogleMaps"
    android:versionCode="1"
    android:versionName="1.0" >

    <uses-sdk android:minSdkVersion="10" />
    <uses-permission android:name="android.permission.INTERNET"/>

    <application
        android:icon="@drawable/ic_launcher"
        android:label="@string/app_name" >
        <activity
            android:name=".HelloGoogleMapsActivity"
            android:label="@string/app_name"
            android:theme="@android:style/Theme.NoTitleBar">
            <intent-filter>
                <action android:name="android.intent.action.MAIN" />

                <category android:name="android.intent.category.LAUNCHER" />
            </intent-filter>
        </activity>
        <uses-library android:name="com.google.android.maps" />
    </application>
</manifest>
res/layout/main.xmlを開き、以下のように変更します。
<?xml version="1.0" encoding="utf-8"?>
<com.google.android.maps.MapView
    xmlns:android="http://schemas.android.com/apk/res/android"
    android:id="@+id/mapview"
    android:layout_width="match_parent"
    android:layout_height="match_parent"
    android:clickable="true"
    android:apiKey="Google MapsのAPIキーを入力"
/>
HelloGoogleMapsActivity.javaを開き、以下のように変更します。
package jp.blogspot.logroid.helloGoogleMaps;

import com.google.android.maps.MapActivity;
import com.google.android.maps.MapView;

import android.os.Bundle;

public class HelloGoogleMapsActivity extends MapActivity {
    /** Called when the activity is first created. */
    @Override
    public void onCreate(Bundle savedInstanceState) {
        super.onCreate(savedInstanceState);
        setContentView(R.layout.main);
        MapView mapView = (MapView) findViewById(R.id.mapview);
        mapView.setBuiltInZoomControls(true);
    }

    @Override
    protected boolean isRouteDisplayed() {
        return false;
    }
}
Google APIsをターゲットとした仮想デバイスで実行します。

Part 2: オーバーレイアイテムの追加

src/パッケージ名で右クリックをして、新規->クラスをクリックします。
名前に、HelloItemizedOverlayを入力し、スーパークラスにcom.google.android.maps.ItemizedOverlayを入力します。
スーパークラスからのコンストラクターにチェックを入れ、完了をクリックします。
HelloItemizedOverlay.javaを開き、以下のように変更します。
package jp.blogspot.logroid.helloGoogleMaps;

import java.util.ArrayList;

import android.app.AlertDialog;
import android.content.Context;
import android.graphics.drawable.Drawable;

import com.google.android.maps.ItemizedOverlay;
import com.google.android.maps.OverlayItem;

public class HelloItemizedOverlay extends ItemizedOverlay<OverlayItem> {
    private ArrayList<OverlayItem> mOverlays = new ArrayList<OverlayItem>();
    private Context mContext;

    public HelloItemizedOverlay(Drawable defaultMarker, Context context) {
     super(boundCenterBottom(defaultMarker));
        mContext = context;
    }

    public void addOverlay(OverlayItem overlay) {
        mOverlays.add(overlay);
        populate();
    }

    @Override
    protected OverlayItem createItem(int i) {
        return mOverlays.get(i);
    }

    @Override
    public int size() {
        return mOverlays.size();
    }

    @Override
    protected boolean onTap(int index) {
        OverlayItem item = mOverlays.get(index);
        AlertDialog.Builder dialog = new AlertDialog.Builder(mContext);
        dialog.setTitle(item.getTitle());
        dialog.setMessage(item.getSnippet());
        dialog.show();
        return true;
    }
}
HelloGoogleMapsActivity.javaを開き、以下のように変更します。
package jp.blogspot.logroid.helloGoogleMaps;

import java.util.List;

import com.google.android.maps.GeoPoint;
import com.google.android.maps.MapActivity;
import com.google.android.maps.MapView;
import com.google.android.maps.Overlay;
import com.google.android.maps.OverlayItem;

import android.graphics.drawable.Drawable;
import android.os.Bundle;

public class HelloGoogleMapsActivity extends MapActivity {
    /** Called when the activity is first created. */
    @Override
    public void onCreate(Bundle savedInstanceState) {
        super.onCreate(savedInstanceState);
        setContentView(R.layout.main);
        MapView mapView = (MapView) findViewById(R.id.mapview);
        mapView.setBuiltInZoomControls(true);

        List<Overlay> mapOverlays = mapView.getOverlays();
        Drawable drawable = this.getResources().getDrawable(R.drawable.androidmarker);
        HelloItemizedOverlay itemizedoverlay = new HelloItemizedOverlay(drawable, this);

        GeoPoint point = new GeoPoint(19240000,-99120000);
        OverlayItem overlayitem = new OverlayItem(point, "Hola, Mundo!", "I'm in Mexico City!");

        itemizedoverlay.addOverlay(overlayitem);
        mapOverlays.add(itemizedoverlay);
    }

    @Override
    protected boolean isRouteDisplayed() {
        return false;
    }
}
Google APIsをターゲットとした仮想デバイスで実行します。
HelloGoogleMapsActivity.javaを開き、以下のように変更します。
package jp.blogspot.logroid.helloGoogleMaps;

import java.util.List;

import com.google.android.maps.GeoPoint;
import com.google.android.maps.MapActivity;
import com.google.android.maps.MapView;
import com.google.android.maps.Overlay;
import com.google.android.maps.OverlayItem;

import android.graphics.drawable.Drawable;
import android.os.Bundle;

public class HelloGoogleMapsActivity extends MapActivity {
    /** Called when the activity is first created. */
    @Override
    public void onCreate(Bundle savedInstanceState) {
        super.onCreate(savedInstanceState);
        setContentView(R.layout.main);
        MapView mapView = (MapView) findViewById(R.id.mapview);
        mapView.setBuiltInZoomControls(true);

        List<Overlay> mapOverlays = mapView.getOverlays();
        Drawable drawable = this.getResources().getDrawable(R.drawable.androidmarker);
        HelloItemizedOverlay itemizedoverlay = new HelloItemizedOverlay(drawable, this);

        GeoPoint point = new GeoPoint(19240000,-99120000);
        OverlayItem overlayitem = new OverlayItem(point, "Hola, Mundo!", "I'm in Mexico City!");

        GeoPoint point2 = new GeoPoint(35410000, 139460000);
        OverlayItem overlayitem2 = new OverlayItem(point2, "Sekai, konichiwa!", "I'm in Japan!");

        itemizedoverlay.addOverlay(overlayitem);
        itemizedoverlay.addOverlay(overlayitem2);
        mapOverlays.add(itemizedoverlay);
    }

    @Override
    protected boolean isRouteDisplayed() {
        return false;
    }
}
Google APIsをターゲットとした仮想デバイスで実行します。
今回出てきたキーワードについて解説。
MapView
マップを表示するビュー
setBuiltInZoomControls
ズームの許可
GeoPoint
経度、緯度のクラス
OverlayItem
地図上にアイテムを表示する
引数として、アイテムがタップされた際のバルーンに表示するタイトル、メッセージを受ける
isRouteDisplayed
MapActivityを継承した場合必須となるメソッド
ルート表示を行うかというフラグを返すために実装する
関連記事

2012年4月23日月曜日

4/23 Android ニュースひとまとめ

Android端末向けアプリが本日配信開始!

『ラグナロクオンライン ギルドマスターズ』がAndroid(TM) OS搭載機種で楽しめるアプリが、本日より待望の配信開始!
Android用に画面レイアウトやデータを最適化しつつ、Webブラウザ版と同じゲームデータへアクセスできるため、外出先ではスマートフォンで、家ではパソコンでといった様にTPOにあわせていつでも気軽にギルド育成を楽しむことが可能です!

既に『ラグナロクオンライン ギルドマスターズ』を楽しんでいる方はもちろん、対応機種をお持ちで『ラグナロクオンラインギルドマスターズ』未プレイの方も、是非この機会にお試しください!!
『ROGM』Android端末向けアプリ本日配信開始! | ゲームその他 | オンラインゲーム情報はSgame(エスゲーム)
http://www.sgame.jp/news/9/10417
ラグナロクのシュミレーションゲームがマーケットで公開されたようです。
ラグナロクはPC版、Android版共にプレイ経験ありますが、Android版はラグが酷くてアンインストールしました。
シュミレーションゲームであればラグが気にならないかな。
後日プレイしてみようと思います。
ROGM - Google Play の Android アプリ
https://play.google.com/store/apps/details?id=jp.gungho.rogm
関連記事

Hello, Views (Gallery編)

Gallery | Android Developers
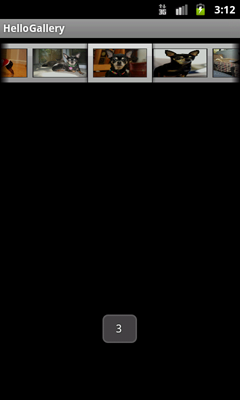
http://developer.android.com/intl/ja/resources/tutorials/views/hello-gallery.html 水平方向にスクロールしてビューを表示するレイアウトのようです。 今回は、写真のギャラリーを作成します。 HelloGalleryというプロジェクトを作成します。 チュートリアルのページから画像をダウンロードして、res/drawable/配下に保存します。 res/layout/main.xmlを開き、以下のように変更します。
<?xml version="1.0" encoding="utf-8"?>
<Gallery xmlns:android="http://schemas.android.com/apk/res/android"
    android:id="@+id/gallery"
    android:layout_width="match_parent"
    android:layout_height="wrap_content"
/>
HelloGalleryActivity.javaを開き、以下のように変更します。
package jp.blogspot.logroid.helloGallery;

import android.app.Activity;
import android.os.Bundle;
import android.view.View;
import android.widget.AdapterView;
import android.widget.AdapterView.OnItemClickListener;
import android.widget.Gallery;
import android.widget.Toast;

public class HelloGalleryActivity extends Activity {
    /** Called when the activity is first created. */
    @Override
    public void onCreate(Bundle savedInstanceState) {
        super.onCreate(savedInstanceState);
        setContentView(R.layout.main);

        Gallery gallery = (Gallery) findViewById(R.id.gallery);
        gallery.setAdapter(new ImageAdapter(this));

        gallery.setOnItemClickListener(new OnItemClickListener() {
            public void onItemClick(@SuppressWarnings("rawtypes") AdapterView parent, View v, int position, long id) {
                Toast.makeText(HelloGalleryActivity.this, "" + position, Toast.LENGTH_SHORT).show();
            }
        });
    }
}
res/values/にattrs.xmlを作成し、以下のように変更します。
<?xml version="1.0" encoding="utf-8"?>
<resources>
    <declare-styleable name="default_gallery">
        <attr name="android:galleryItemBackground" />
    </declare-styleable>
</resources>
HelloGalleryActivity.javaを開き、以下のように変更します。
package jp.blogspot.logroid.helloGallery;

import android.app.Activity;
import android.content.Context;
import android.content.res.TypedArray;
import android.os.Bundle;
import android.view.View;
import android.view.ViewGroup;
import android.widget.AdapterView;
import android.widget.AdapterView.OnItemClickListener;
import android.widget.BaseAdapter;
import android.widget.Gallery;
import android.widget.ImageView;
import android.widget.Toast;

public class HelloGalleryActivity extends Activity {
    /** Called when the activity is first created. */
    @Override
    public void onCreate(Bundle savedInstanceState) {
        super.onCreate(savedInstanceState);
        setContentView(R.layout.main);

        Gallery gallery = (Gallery) findViewById(R.id.gallery);
        gallery.setAdapter(new ImageAdapter(this));

        gallery.setOnItemClickListener(new OnItemClickListener() {
            public void onItemClick(@SuppressWarnings("rawtypes") AdapterView parent, View v, int position, long id) {
                Toast.makeText(HelloGalleryActivity.this, "" + position, Toast.LENGTH_SHORT).show();
            }
        });
    }

    public class ImageAdapter extends BaseAdapter {
        int mGalleryItemBackground;
        private Context mContext;

        private Integer[] mImageIds = {
                R.drawable.sample_1,
                R.drawable.sample_2,
                R.drawable.sample_3,
                R.drawable.sample_4,
                R.drawable.sample_5,
                R.drawable.sample_6,
                R.drawable.sample_7
        };

        public ImageAdapter(Context c) {
            mContext = c;
            TypedArray a = obtainStyledAttributes(R.styleable.default_gallery);
            mGalleryItemBackground = a.getResourceId(
                    R.styleable.default_gallery_android_galleryItemBackground, 0);
            a.recycle();
        }

        public int getCount() {
            return mImageIds.length;
        }

        public Object getItem(int position) {
            return position;
        }

        public long getItemId(int position) {
            return position;
        }

        public View getView(int position, View convertView, ViewGroup parent) {
            ImageView i = new ImageView(mContext);

            i.setImageResource(mImageIds[position]);
            i.setLayoutParams(new Gallery.LayoutParams(150, 100));
            i.setScaleType(ImageView.ScaleType.FIT_XY);
            i.setBackgroundResource(mGalleryItemBackground);

            return i;
        }
    }
}
実行します。
今回出てきたキーワードについて解説。
setImageResource
表示する画像のリソースIDを指定
リソースIDは、R.drawable.hogeで取得できる
setBackgroundResource
背景として表示するリソースIDを指定
obtainStyledAttributes
レイアウトスタイルを取得
getResourceId
リソースIDの取得
recycle
TypedArrayの破棄
関連記事

2012年4月22日日曜日

Hello, Views (AutoComplete編)

Auto Complete | Android Developers
http://developer.android.com/intl/ja/resources/tutorials/views/hello-autocomplete.html テキストビューでのオートコンプリートのチュートリアルです。 HelloAutoCompleteというプロジェクトを作成します。 res/layout/にlist_item.xmlを作成し、以下のように変更します。
<?xml version="1.0" encoding="utf-8"?>
<TextView xmlns:android="http://schemas.android.com/apk/res/android"
    android:layout_width="match_parent"
    android:layout_height="match_parent"
    android:padding="10dp"
    android:textSize="16sp"
    android:textColor="#000">

</TextView>
res/layout/main.xmlを開き、以下のように変更します。
<?xml version="1.0" encoding="utf-8"?>
<LinearLayout xmlns:android="http://schemas.android.com/apk/res/android"
    android:orientation="horizontal"
    android:layout_width="match_parent"
    android:layout_height="wrap_content"
    android:padding="5dp">
    <TextView
        android:layout_width="wrap_content"
        android:layout_height="wrap_content"
        android:text="@string/country" />
    <AutoCompleteTextView android:id="@+id/autocomplete_country"
        android:layout_width="match_parent"
        android:layout_height="wrap_content"
        android:layout_marginLeft="5dp"/>

</LinearLayout>
res/values/strings.xmlを開き、以下のように変更します。
<?xml version="1.0" encoding="utf-8"?>
<resources>

    <string name="hello">Hello World, HelloAutoCompleteActivity!</string>
    <string name="app_name">HelloAutoComplete</string>
    <string name="country">Country</string>

</resources>
res/values/にarray.xmlを作成し、以下のように変更します。
<?xml version="1.0" encoding="utf-8"?>
<resources>
    <string-array name="countries_array">
        <item>Afghanistan</item>
        <item>Albania</item>
        <item>Algeria</item>
        <item>American Samoa</item>
        <item>Andorra</item>
        <item>Angola</item>
        <item>Anguilla</item>
        <item>Antarctica</item>
        <item>Antigua and Barbuda</item>
        <item>Argentina</item>
        <item>Armenia</item>
        <item>Aruba</item>
        <item>Australia</item>
        <item>Austria</item>
        <item>Azerbaijan</item>
        <item>Bahrain</item>
        <item>Bangladesh</item>
        <item>Barbados</item>
        <item>Belarus</item>
        <item>Belgium</item>
        <item>Belize</item>
        <item>Benin</item>
        <item>Bermuda</item>
        <item>Bhutan</item>
        <item>Bolivia</item>
        <item>Bosnia and Herzegovina</item>
        <item>Botswana</item>
        <item>Bouvet Island</item>
        <item>Brazil</item>
        <item>British Indian Ocean Territory</item>
        <item>British Virgin Islands</item>
        <item>Brunei</item>
        <item>Bulgaria</item>
        <item>Burkina Faso</item>
        <item>Burundi</item>
        <item>Cote d\'Ivoire</item>
        <item>Cambodia</item>
        <item>Cameroon</item>
        <item>Canada</item>
        <item>Cape Verde</item>
        <item>Cayman Islands</item>
        <item>Central African Republic</item>
        <item>Chad</item>
        <item>Chile</item>
        <item>China</item>
        <item>Christmas Island</item>
        <item>Cocos (Keeling) Islands</item>
        <item>Colombia</item>
        <item>Comoros</item>
        <item>Congo</item>
        <item>Cook Islands</item>
        <item>Costa Rica</item>
        <item>Croatia</item>
        <item>Cuba</item>
        <item>Cyprus</item>
        <item>Czech Republic</item>
        <item>Democratic Republic of the Congo</item>
        <item>Denmark</item>
        <item>Djibouti</item>
        <item>Dominica</item>
        <item>Dominican Republic</item>
        <item>East Timor</item>
        <item>Ecuador</item>
        <item>Egypt</item>
        <item>El Salvador</item>
        <item>Equatorial Guinea</item>
        <item>Eritrea</item>
        <item>Estonia</item>
        <item>Ethiopia</item>
        <item>Faeroe Islands</item>
        <item>Falkland Islands</item>
        <item>Fiji</item>
        <item>Finland</item>
        <item>Former Yugoslav Republic of Macedonia</item>
        <item>France</item>
        <item>French Guiana</item>
        <item>French Polynesia</item>
        <item>French Southern Territories</item>
        <item>Gabon</item>
        <item>Georgia</item>
        <item>Germany</item>
        <item>Ghana</item>
        <item>Gibraltar</item>
        <item>Greece</item>
        <item>Greenland</item>
        <item>Grenada</item>
        <item>Guadeloupe</item>
        <item>Guam</item>
        <item>Guatemala</item>
        <item>Guinea</item>
        <item>Guinea-Bissau</item>
        <item>Guyana</item>
        <item>Haiti</item>
        <item>Heard Island and McDonald Islands</item>
        <item>Honduras</item>
        <item>Hong Kong</item>
        <item>Hungary</item>
        <item>Iceland</item>
        <item>India</item>
        <item>Indonesia</item>
        <item>Iran</item>
        <item>Iraq</item>
        <item>Ireland</item>
        <item>Israel</item>
        <item>Italy</item>
        <item>Jamaica</item>
        <item>Japan</item>
        <item>Jordan</item>
        <item>Kazakhstan</item>
        <item>Kenya</item>
        <item>Kiribati</item>
        <item>Kuwait</item>
        <item>Kyrgyzstan</item>
        <item>Laos</item>
        <item>Latvia</item>
        <item>Lebanon</item>
        <item>Lesotho</item>
        <item>Liberia</item>
        <item>Libya</item>
        <item>Liechtenstein</item>
        <item>Lithuania</item>
        <item>Luxembourg</item>
        <item>Macau</item>
        <item>Madagascar</item>
        <item>Malawi</item>
        <item>Malaysia</item>
        <item>Maldives</item>
        <item>Mali</item>
        <item>Malta</item>
        <item>Marshall Islands</item>
        <item>Martinique</item>
        <item>Mauritania</item>
        <item>Mauritius</item>
        <item>Mayotte</item>
        <item>Mexico</item>
        <item>Micronesia</item>
        <item>Moldova</item>
        <item>Monaco</item>
        <item>Mongolia</item>
        <item>Montserrat</item>
        <item>Morocco</item>
        <item>Mozambique</item>
        <item>Myanmar</item>
        <item>Namibia</item>
        <item>Nauru</item>
        <item>Nepal</item>
        <item>Netherlands</item>
        <item>Netherlands Antilles</item>
        <item>New Caledonia</item>
        <item>New Zealand</item>
        <item>Nicaragua</item>
        <item>Niger</item>
        <item>Nigeria</item>
        <item>Niue</item>
        <item>Norfolk Island</item>
        <item>North Korea</item>
        <item>Northern Marianas</item>
        <item>Norway</item>
        <item>Oman</item>
        <item>Pakistan</item>
        <item>Palau</item>
        <item>Panama</item>
        <item>Papua New Guinea</item>
        <item>Paraguay</item>
        <item>Peru</item>
        <item>Philippines</item>
        <item>Pitcairn Islands</item>
        <item>Poland</item>
        <item>Portugal</item>
        <item>Puerto Rico</item>
        <item>Qatar</item>
        <item>Reunion</item>
        <item>Romania</item>
        <item>Russia</item>
        <item>Rwanda</item>
        <item>Sqo Tome and Principe</item>
        <item>Saint Helena</item>
        <item>Saint Kitts and Nevis</item>
        <item>Saint Lucia</item>
        <item>Saint Pierre and Miquelon</item>
        <item>Saint Vincent and the Grenadines</item>
        <item>Samoa</item>
        <item>San Marino</item>
        <item>Saudi Arabia</item>
        <item>Senegal</item>
        <item>Seychelles</item>
        <item>Sierra Leone</item>
        <item>Singapore</item>
        <item>Slovakia</item>
        <item>Slovenia</item>
        <item>Solomon Islands</item>
        <item>Somalia</item>
        <item>South Africa</item>
        <item>South Georgia and the South Sandwich Islands</item>
        <item>South Korea</item>
        <item>Spain</item>
        <item>Sri Lanka</item>
        <item>Sudan</item>
        <item>Suriname</item>
        <item>Svalbard and Jan Mayen</item>
        <item>Swaziland</item>
        <item>Sweden</item>
        <item>Switzerland</item>
        <item>Syria</item>
        <item>Taiwan</item>
        <item>Tajikistan</item>
        <item>Tanzania</item>
        <item>Thailand</item>
        <item>The Bahamas</item>
        <item>The Gambia</item>
        <item>Togo</item>
        <item>Tokelau</item>
        <item>Tonga</item>
        <item>Trinidad and Tobago</item>
        <item>Tunisia</item>
        <item>Turkey</item>
        <item>Turkmenistan</item>
        <item>Turks and Caicos Islands</item>
        <item>Tuvalu</item>
        <item>Virgin Islands</item>
        <item>Uganda</item>
        <item>Ukraine</item>
        <item>United Arab Emirates</item>
        <item>United Kingdom</item>
        <item>United States</item>
        <item>United States Minor Outlying Islands</item>
        <item>Uruguay</item>
        <item>Uzbekistan</item>
        <item>Vanuatu</item>
        <item>Vatican City</item>
        <item>Venezuela</item>
        <item>Vietnam</item>
        <item>Wallis and Futuna</item>
        <item>Western Sahara</item>
        <item>Yemen</item>
        <item>Yugoslavia</item>
        <item>Zambia</item>
        <item>Zimbabwe</item>
    </string-array>
</resources>
HelloAutoCompleteActivity.javaを開き、以下のように変更します。
package jp.blogspot.logroid.helloAutoComplete;

import android.app.Activity;
import android.os.Bundle;
import android.widget.ArrayAdapter;
import android.widget.AutoCompleteTextView;

public class HelloAutoCompleteActivity extends Activity {
    /** Called when the activity is first created. */
    @Override
    protected void onCreate(Bundle savedInstanceState) {
        super.onCreate(savedInstanceState);
        setContentView(R.layout.main);

        AutoCompleteTextView textView = (AutoCompleteTextView) findViewById(R.id.autocomplete_country);
        String[] countries = getResources().getStringArray(R.array.countries_array);
        ArrayAdapter<String> adapter = new ArrayAdapter<String>(this, R.layout.list_item, countries);
        textView.setAdapter(adapter);
    }
}
実行します。
今回出てきたキーワードについて解説。
AutoCompleteTextView
オートコンプリートを行うテキストビュー
setAdapterでArrayAdapterを指定すると、オートコンプリートを実装できる
関連記事

2012年4月21日土曜日

4/21 Android ニュースひとまとめ

有料Androidアプリはビジネスにならないという声がよく聞かれますが、その辺に関してはやはり同意見でしょうか?

「Androidの有料アプリで、大手デベロッパーとしてのクオリティを保つと、採算性を維持するのが難しいのは事実だと思います。端末の動作検証を しっかりやるとなると、そのコストも大きいですし、それをやっても機種依存の問題を潰しきれていない状況だと感じます。この点でiOSに比べて不利だと思います。また、私自身も、余裕を持てる収入を得られていないのが現実です」

今後も道具屋シリーズの新作はリリースされると思っていいのでしょうか?

「今後もリリースの予定はありますが、マンネリ化しないように、次回はゲームの世界観を大きく変えたいと思います」
「道具屋の冒険」作者に聞く Androidアプリ“個人開発者”の現実 | 【EXドロイド(エックスドロイド)】
http://exdroid.jp/d/34685/
やはり、有料アプリとして動作保証を行うために検証等のコストが増え、あまり採算が取れないみたいですね。
趣味の一環であればいいのかもしれませんが、アプリ開発で生活するというレベルに持っていくには、なかなか厳しそう。
次回作は世界観が変わるとのこと。
楽しみに待ちたいと思います。
関連記事

[Android アプリレビュー] クルーズ大紀行

情報
クルーズ大紀行
クルーズ大紀行
6週目でゴールド絨毯引継
クルーズ大紀行
各種カイロくん像引継
クルーズ大紀行
シアター引継
クルーズ大紀行
かなり邪道なプレイ
クルーズ大紀行
クルーザーを運営するゲーム。
相性を考えて施設を配置したり、アイテムで品質、料金をアップしたり、ゆけむり温泉郷と同じようなシステム。
活力という新しいシステムが導入されており、建築のアイテムによって、活力を上昇させることが出来る。
活力が貯まるとオーラが発生し、ファンが増えやすくなる。
ファンが増えると、国王の招待イベントを発生させることが出来る。
国王に満足してもらえると、新しい国を紹介してもらうことができ、新しい客や、アイテムを獲得できる。
ゆけむり温泉郷を楽しめた人は同じように楽しめる。逆に、クルーズ大紀行にハマった人はゆけむり温泉郷も楽しめるはず。
攻略
16年4月でクリアとなる。
クリア時に引き継がれる項目は以下。
  • 銅、銀、金カイロくん像
  • シアター
  • シアターの演目
  • 200,000で購入可能な各種絨毯
現在6週目に突入。 ここまでやると、色々と縛りプレイをやっているのだが、銅、銀、金カイロくん像、シアター(カイロ祭り)を手に入れていれば最終的に1Fのみでクリアできることが分かった。 国王や審査員は窓側の部屋に泊まらせて近くにカイロくん像を置く。 シアターの演目はカイロ祭り。オーラが発生する事でファンが増えやすくなる。 私が1Fのみのプレイで設置する施設は、船室、自販機、ATM、観光案内所、レストラン(屋外)のみ。 国王、審査員向けにゆくゆく豪華な船室を1部屋設置しても良い。 また、船内への入り口を一つに絞ることで、客の活力を効率的に高めることが出来る。 入り口付近の床を撤去する事で、その入り口から出入りしなくなる。 私は、右上の入り口以外は閉鎖した。 また、入り口近くに、銅カイロくん像を設置。これで、船内に入るすべての客の活力アップを行える。 船内の通路は活力が上がる絨毯にする。 これでだいぶ資金に余裕ができると思うので、アイテム購入や、投資に思う存分お金を使うことが出来る。 アイテムは惜しみなく使う。 りんごは大量に購入可能なので、船室に使用するのがオススメ。 船体を無拡張でクリアしたこともあったが、あまり面白くなかったw 通路次第で迷路みたいな船内にすることもできます。
クルーズ大紀行
動作
アプリケーションの安定性
価格
コストパフォーマンスが良いかどうか
関連記事

Hello, Views (Spinner編)

Spinner | Android Developers
http://developer.android.com/intl/ja/resources/tutorials/views/hello-spinner.html JavaScriptのセレクトオブジェクト、C#等のコンボボックスですね。
HelloSpinnerというプロジェクトを作成します。
res/layout/main.xmlを開き、以下のように変更します。
<?xml version="1.0" encoding="utf-8"?>
<LinearLayout xmlns:android="http://schemas.android.com/apk/res/android"
    android:orientation="vertical"
    android:padding="10dip"
    android:layout_width="match_parent"
    android:layout_height="wrap_content">
    <TextView
        android:layout_width="match_parent"
        android:layout_height="wrap_content"
        android:layout_marginTop="10dip"
        android:text="@string/planet_prompt"
    />
    <Spinner 
        android:id="@+id/spinner"
        android:layout_width="match_parent"
        android:layout_height="wrap_content"
        android:prompt="@string/planet_prompt"
    />
</LinearLayout>
res/values/strings.xmlを開き、以下のように変更します。
<?xml version="1.0" encoding="utf-8"?>
<resources>

    <string name="hello">Hello World, HelloSpinnerActivity!</string>
    <string name="app_name">HelloSpinner</string>
    <string name="planet_prompt">Choose a planet</string>
    <string-array name="planets_array">
        <item>Mercury</item>
        <item>Venus</item>
        <item>Earth</item>
        <item>Mars</item>
        <item>Jupiter</item>
        <item>Saturn</item>
        <item>Uranus</item>
        <item>Neptune</item>
    </string-array>

</resources>
HelloSpinnerActivity.javaを開き、以下のように変更します。
package jp.blogspot.logroid.helloSpinner;

import android.app.Activity;
import android.os.Bundle;
import android.widget.ArrayAdapter;
import android.widget.Spinner;

public class HelloSpinnerActivity extends Activity {
    /** Called when the activity is first created. */
    @Override
    public void onCreate(Bundle savedInstanceState) {
        super.onCreate(savedInstanceState);
        setContentView(R.layout.main);

        Spinner spinner = (Spinner) findViewById(R.id.spinner);
        ArrayAdapter<CharSequence> adapter = ArrayAdapter.createFromResource(
                this, R.array.planets_array, android.R.layout.simple_spinner_item);
        adapter.setDropDownViewResource(android.R.layout.simple_spinner_dropdown_item);
        spinner.setAdapter(adapter);
    }
}
Spennerのアイテムが選択された際にアプリケーションに通知を行うコールバックメソッドを定義します。 HelloSpinnerActivity.javaを開き、以下のように変更します。
package jp.blogspot.logroid.helloSpinner;

import android.app.Activity;
import android.os.Bundle;
import android.view.View;
import android.widget.AdapterView;
import android.widget.AdapterView.OnItemSelectedListener;
import android.widget.ArrayAdapter;
import android.widget.Spinner;
import android.widget.Toast;

public class HelloSpinnerActivity extends Activity {
    /** Called when the activity is first created. */
    @Override
    public void onCreate(Bundle savedInstanceState) {
        super.onCreate(savedInstanceState);
        setContentView(R.layout.main);

        Spinner spinner = (Spinner) findViewById(R.id.spinner);
        ArrayAdapter<CharSequence> adapter = ArrayAdapter.createFromResource(
                this, R.array.planets_array, android.R.layout.simple_spinner_item);
        adapter.setDropDownViewResource(android.R.layout.simple_spinner_dropdown_item);
        spinner.setAdapter(adapter);
    }

    public class MyOnItemSelectedListener implements OnItemSelectedListener {

        public void onItemSelected(AdapterView<?> parent,
            View view, int pos, long id) {
          Toast.makeText(parent.getContext(), "The planet is " +
              parent.getItemAtPosition(pos).toString(), Toast.LENGTH_LONG).show();
        }

        public void onNothingSelected(@SuppressWarnings("rawtypes") AdapterView parent) {
          // Do nothing.
        }
    }
}
MyOnItemSelectedListenerをSpennerに登録します。 HelloSpinnerActivity.javaを開き、以下のように変更します。
package jp.blogspot.logroid.helloSpinner;

import android.app.Activity;
import android.os.Bundle;
import android.view.View;
import android.widget.AdapterView;
import android.widget.AdapterView.OnItemSelectedListener;
import android.widget.ArrayAdapter;
import android.widget.Spinner;
import android.widget.Toast;

public class HelloSpinnerActivity extends Activity {
    /** Called when the activity is first created. */
    @Override
    public void onCreate(Bundle savedInstanceState) {
        super.onCreate(savedInstanceState);
        setContentView(R.layout.main);

        Spinner spinner = (Spinner) findViewById(R.id.spinner);
        ArrayAdapter<CharSequence> adapter = ArrayAdapter.createFromResource(
                this, R.array.planets_array, android.R.layout.simple_spinner_item);
        adapter.setDropDownViewResource(android.R.layout.simple_spinner_dropdown_item);
        spinner.setAdapter(adapter);

        spinner.setOnItemSelectedListener(new MyOnItemSelectedListener());
    }

    public class MyOnItemSelectedListener implements OnItemSelectedListener {

        public void onItemSelected(AdapterView<?> parent,
            View view, int pos, long id) {
          Toast.makeText(parent.getContext(), "The planet is " +
              parent.getItemAtPosition(pos).toString(), Toast.LENGTH_LONG).show();
        }

        public void onNothingSelected(@SuppressWarnings("rawtypes") AdapterView parent) {
          // Do nothing.
        }
    }
}
実行します。
今回出てきたキーワードについて解説。
Spenner
JavaScriptでのセレクトオブジェクト、C#でのコンボボックス
setDropDownViewResource
Spennerで表示されるビューを指定
simple_spinner_dropdown_item
Androidで定義されているレイアウトファイルのID
setDropDownViewResourceにセットすると、項目の隣にラジオボタンのようなオブジェクトが表示される
setOnItemSelectedListener
Spennerのアイテムがセレクトされた際のイベントリスナ登録
getItemAtPosition
選択されたビューの取得
@SuppressWarnings
Javaのアノテーション
parentがraw型とのことで、警告が発生したため、@SuppressWarnings("rawtypes")を追記。
これで警告を無効化できます。
関連記事

2012年4月20日金曜日

Hello, Views (Form Stuff編)

Form Stuff | Android Developers
http://developer.android.com/intl/ja/resources/tutorials/views/hello-formstuff.html フォーム要素のチュートリアルです。
HelloFormStuffというプロジェクトを作成します。
res/layout/main.xmlを開き、以下のように変更します。
<?xml version="1.0" encoding="utf-8"?>
<LinearLayout xmlns:android="http://schemas.android.com/apk/res/android"
    android:layout_width="match_parent"
    android:layout_height="match_parent"
    android:orientation="vertical" >
</LinearLayout>
カスタムボタンを配置します。
チュートリアルページの3つの画像をローカルに保存し、res/drawable/ ディレクトリに保存します。
res/drawable/に android_button.xml を作成し、以下のように変更します。
<?xml version="1.0" encoding="utf-8"?>
<selector xmlns:android="http://schemas.android.com/apk/res/android">
    <item android:drawable="@drawable/android_pressed"
          android:state_pressed="true" />
    <item android:drawable="@drawable/android_focused"
          android:state_focused="true" />
    <item android:drawable="@drawable/android_normal" />
</selector>
res/layout/main.xmlを開き、以下のように変更します。
<?xml version="1.0" encoding="utf-8"?>
<LinearLayout xmlns:android="http://schemas.android.com/apk/res/android"
    android:layout_width="match_parent"
    android:layout_height="match_parent"
    android:orientation="vertical" >
    
    <Button
        android:id="@+id/button"
        android:layout_width="wrap_content"
        android:layout_height="wrap_content"
        android:padding="10dp"
        android:background="@drawable/android_button" />

</LinearLayout>
HelloFormStuffActivity.javaを開き、以下のように変更します。
package jp.blogspot.logroid.helloFormStuff;

import android.app.Activity;
import android.os.Bundle;
import android.view.View;
import android.view.View.OnClickListener;
import android.widget.Button;
import android.widget.Toast;

public class HelloFormStuffActivity extends Activity {
    /** Called when the activity is first created. */
    @Override
    public void onCreate(Bundle savedInstanceState) {
        super.onCreate(savedInstanceState);
        setContentView(R.layout.main);
        
        final Button button = (Button) findViewById(R.id.button);
        button.setOnClickListener(new OnClickListener() {
            public void onClick(View v) {
                // Perform action on clicks
                Toast.makeText(HelloFormStuffActivity.this, "Beep Bop", Toast.LENGTH_SHORT).show();
            }
        });
    }
}
実行します。
res/layout/main.xmlを開き、以下のように変更します。
<?xml version="1.0" encoding="utf-8"?>
<LinearLayout xmlns:android="http://schemas.android.com/apk/res/android"
    android:layout_width="match_parent"
    android:layout_height="match_parent"
    android:orientation="vertical" >
    
    <Button
        android:id="@+id/button"
        android:layout_width="wrap_content"
        android:layout_height="wrap_content"
        android:padding="10dp"
        android:background="@drawable/android_button" />

    <EditText
        android:id="@+id/edittext"
        android:layout_width="match_parent"
        android:layout_height="wrap_content"
        android:inputType="text" />

</LinearLayout>
HelloFormStuffActivity.javaを開き、以下のように変更します。
package jp.blogspot.logroid.helloFormStuff;

import android.app.Activity;
import android.os.Bundle;
import android.view.KeyEvent;
import android.view.View;
import android.view.View.OnClickListener;
import android.view.View.OnKeyListener;
import android.widget.Button;
import android.widget.EditText;
import android.widget.Toast;

public class HelloFormStuffActivity extends Activity {
    /** Called when the activity is first created. */
    @Override
    public void onCreate(Bundle savedInstanceState) {
        super.onCreate(savedInstanceState);
        setContentView(R.layout.main);
        
        final Button button = (Button) findViewById(R.id.button);
        button.setOnClickListener(new OnClickListener() {
            public void onClick(View v) {
                // Perform action on clicks
                Toast.makeText(HelloFormStuffActivity.this, "Beep Bop", Toast.LENGTH_SHORT).show();
            }
        });
        
        final EditText edittext = (EditText) findViewById(R.id.edittext);
        edittext.setOnKeyListener(new OnKeyListener() {
            public boolean onKey(View v, int keyCode, KeyEvent event) {
                // If the event is a key-down event on the "enter" button
                if ((event.getAction() == KeyEvent.ACTION_DOWN) &&
                    (keyCode == KeyEvent.KEYCODE_ENTER)) {
                  // Perform action on key press
                  Toast.makeText(HelloFormStuffActivity.this, edittext.getText(), Toast.LENGTH_SHORT).show();
                  return true;
                }
                return false;
            }
        });
    }
}
実行します。
res/layout/main.xmlを開き、以下のように変更します。
<?xml version="1.0" encoding="utf-8"?>
<LinearLayout xmlns:android="http://schemas.android.com/apk/res/android"
    android:layout_width="match_parent"
    android:layout_height="match_parent"
    android:orientation="vertical" >
    
    <Button
        android:id="@+id/button"
        android:layout_width="wrap_content"
        android:layout_height="wrap_content"
        android:padding="10dp"
        android:background="@drawable/android_button" />

    <EditText
        android:id="@+id/edittext"
        android:layout_width="match_parent"
        android:layout_height="wrap_content"
        android:inputType="text" />
    
    <CheckBox android:id="@+id/checkbox"
        android:layout_width="wrap_content"
        android:layout_height="wrap_content"
        android:text="@string/checkbox_label" />

</LinearLayout>
res/values/strings.xmlを開き、以下のように変更します。
<?xml version="1.0" encoding="utf-8"?>
<resources>

    <string name="hello">Hello World, HelloFormStuffActivity!</string>
    <string name="app_name">HelloFormStuff</string>
    <string name="checkbox_label">check it out</string>

</resources>
HelloFormStuffActivity.javaを開き、以下のように変更します。
package jp.blogspot.logroid.helloFormStuff;

import android.app.Activity;
import android.os.Bundle;
import android.view.KeyEvent;
import android.view.View;
import android.view.View.OnClickListener;
import android.view.View.OnKeyListener;
import android.widget.Button;
import android.widget.CheckBox;
import android.widget.EditText;
import android.widget.Toast;

public class HelloFormStuffActivity extends Activity {
    /** Called when the activity is first created. */
    @Override
    public void onCreate(Bundle savedInstanceState) {
        super.onCreate(savedInstanceState);
        setContentView(R.layout.main);
        
        final Button button = (Button) findViewById(R.id.button);
        button.setOnClickListener(new OnClickListener() {
            public void onClick(View v) {
                // Perform action on clicks
                Toast.makeText(HelloFormStuffActivity.this, "Beep Bop", Toast.LENGTH_SHORT).show();
            }
        });
        
        final EditText edittext = (EditText) findViewById(R.id.edittext);
        edittext.setOnKeyListener(new OnKeyListener() {
            public boolean onKey(View v, int keyCode, KeyEvent event) {
                // If the event is a key-down event on the "enter" button
                if ((event.getAction() == KeyEvent.ACTION_DOWN) &&
                    (keyCode == KeyEvent.KEYCODE_ENTER)) {
                  // Perform action on key press
                  Toast.makeText(HelloFormStuffActivity.this, edittext.getText(), Toast.LENGTH_SHORT).show();
                  return true;
                }
                return false;
            }
        });
        
        final CheckBox checkbox = (CheckBox) findViewById(R.id.checkbox);
        checkbox.setOnClickListener(new OnClickListener() {
            public void onClick(View v) {
                // Perform action on clicks, depending on whether it's now checked
                if (((CheckBox) v).isChecked()) {
                    Toast.makeText(HelloFormStuffActivity.this, "Selected", Toast.LENGTH_SHORT).show();
                } else {
                    Toast.makeText(HelloFormStuffActivity.this, "Not selected", Toast.LENGTH_SHORT).show();
                }
            }
        });
    }
}
実行します。
res/layout/main.xmlを開き、以下のように変更します。
<?xml version="1.0" encoding="utf-8"?>
<LinearLayout xmlns:android="http://schemas.android.com/apk/res/android"
    android:layout_width="match_parent"
    android:layout_height="match_parent"
    android:orientation="vertical" >
    
    <Button
        android:id="@+id/button"
        android:layout_width="wrap_content"
        android:layout_height="wrap_content"
        android:padding="10dp"
        android:background="@drawable/android_button" />

    <EditText
        android:id="@+id/edittext"
        android:layout_width="match_parent"
        android:layout_height="wrap_content"
        android:inputType="text" />
    
    <CheckBox android:id="@+id/checkbox"
        android:layout_width="wrap_content"
        android:layout_height="wrap_content"
        android:text="@string/checkbox_label" />

    <RadioGroup
        android:layout_width="match_parent"
        android:layout_height="wrap_content"
        android:orientation="vertical">
        <RadioButton android:id="@+id/radio_red"
            android:layout_width="wrap_content"
            android:layout_height="wrap_content"
            android:text="@string/red" />
        <RadioButton android:id="@+id/radio_blue"
            android:layout_width="wrap_content"
            android:layout_height="wrap_content"
            android:text="@string/blue" />
    </RadioGroup>

</LinearLayout>
res/values/strings.xmlを開き、以下のように変更します。
<?xml version="1.0" encoding="utf-8"?>
<resources>

    <string name="hello">Hello World, HelloFormStuffActivity!</string>
    <string name="app_name">HelloFormStuff</string>
    <string name="checkbox_label">check it out</string>
    <string name="red">Red</string>
    <string name="blue">Blue</string>

</resources>
HelloFormStuffActivity.javaを開き、以下のように変更します。
package jp.blogspot.logroid.helloFormStuff;

import android.app.Activity;
import android.os.Bundle;
import android.view.KeyEvent;
import android.view.View;
import android.view.View.OnClickListener;
import android.view.View.OnKeyListener;
import android.widget.Button;
import android.widget.CheckBox;
import android.widget.EditText;
import android.widget.RadioButton;
import android.widget.Toast;

public class HelloFormStuffActivity extends Activity {
    /** Called when the activity is first created. */
    @Override
    public void onCreate(Bundle savedInstanceState) {
        super.onCreate(savedInstanceState);
        setContentView(R.layout.main);
        
        final Button button = (Button) findViewById(R.id.button);
        button.setOnClickListener(new OnClickListener() {
            public void onClick(View v) {
                // Perform action on clicks
                Toast.makeText(HelloFormStuffActivity.this, "Beep Bop", Toast.LENGTH_SHORT).show();
            }
        });
        
        final EditText edittext = (EditText) findViewById(R.id.edittext);
        edittext.setOnKeyListener(new OnKeyListener() {
            public boolean onKey(View v, int keyCode, KeyEvent event) {
                // If the event is a key-down event on the "enter" button
                if ((event.getAction() == KeyEvent.ACTION_DOWN) &&
                    (keyCode == KeyEvent.KEYCODE_ENTER)) {
                  // Perform action on key press
                  Toast.makeText(HelloFormStuffActivity.this, edittext.getText(), Toast.LENGTH_SHORT).show();
                  return true;
                }
                return false;
            }
        });
        
        final CheckBox checkbox = (CheckBox) findViewById(R.id.checkbox);
        checkbox.setOnClickListener(new OnClickListener() {
            public void onClick(View v) {
                // Perform action on clicks, depending on whether it's now checked
                if (((CheckBox) v).isChecked()) {
                    Toast.makeText(HelloFormStuffActivity.this, "Selected", Toast.LENGTH_SHORT).show();
                } else {
                    Toast.makeText(HelloFormStuffActivity.this, "Not selected", Toast.LENGTH_SHORT).show();
                }
            }
        });
        
        final RadioButton radio_red = (RadioButton) findViewById(R.id.radio_red);
        final RadioButton radio_blue = (RadioButton) findViewById(R.id.radio_blue);
        radio_red.setOnClickListener(radio_listener);
        radio_blue.setOnClickListener(radio_listener);
    }
    
    private OnClickListener radio_listener = new OnClickListener() {
        public void onClick(View v) {
            // Perform action on clicks
            RadioButton rb = (RadioButton) v;
            Toast.makeText(HelloFormStuffActivity.this, rb.getText(), Toast.LENGTH_SHORT).show();
        }
    };
}
実行します。
res/layout/main.xmlを開き、以下のように変更します。
<?xml version="1.0" encoding="utf-8"?>
<LinearLayout xmlns:android="http://schemas.android.com/apk/res/android"
    android:layout_width="match_parent"
    android:layout_height="match_parent"
    android:orientation="vertical" >
    
    <Button
        android:id="@+id/button"
        android:layout_width="wrap_content"
        android:layout_height="wrap_content"
        android:padding="10dp"
        android:background="@drawable/android_button" />

    <EditText
        android:id="@+id/edittext"
        android:layout_width="match_parent"
        android:layout_height="wrap_content"
        android:inputType="text" />
    
    <CheckBox android:id="@+id/checkbox"
        android:layout_width="wrap_content"
        android:layout_height="wrap_content"
        android:text="@string/checkbox_label" />

    <RadioGroup
        android:layout_width="match_parent"
        android:layout_height="wrap_content"
        android:orientation="vertical">
        <RadioButton android:id="@+id/radio_red"
            android:layout_width="wrap_content"
            android:layout_height="wrap_content"
            android:text="@string/red" />
        <RadioButton android:id="@+id/radio_blue"
            android:layout_width="wrap_content"
            android:layout_height="wrap_content"
            android:text="@string/blue" />
    </RadioGroup>

    <ToggleButton android:id="@+id/togglebutton"
        android:layout_width="wrap_content"
        android:layout_height="wrap_content"
        android:textOn="@string/vibrate_on"
        android:textOff="@string/vibrate_off"/>

</LinearLayout>
res/values/strings.xmlを開き、以下のように変更します。
<?xml version="1.0" encoding="utf-8"?>
<resources>

    <string name="hello">Hello World, HelloFormStuffActivity!</string>
    <string name="app_name">HelloFormStuff</string>
    <string name="checkbox_label">check it out</string>
    <string name="red">Red</string>
    <string name="blue">Blue</string>
    <string name="vibrate_on">Vibrate on</string>
    <string name="vibrate_off">Vibrate off</string>

</resources>
HelloFormStuffActivity.javaを開き、以下のように変更します。
package jp.blogspot.logroid.helloFormStuff;

import android.app.Activity;
import android.os.Bundle;
import android.view.KeyEvent;
import android.view.View;
import android.view.View.OnClickListener;
import android.view.View.OnKeyListener;
import android.widget.Button;
import android.widget.CheckBox;
import android.widget.EditText;
import android.widget.RadioButton;
import android.widget.Toast;
import android.widget.ToggleButton;

public class HelloFormStuffActivity extends Activity {
    /** Called when the activity is first created. */
    @Override
    public void onCreate(Bundle savedInstanceState) {
        super.onCreate(savedInstanceState);
        setContentView(R.layout.main);
        
        final Button button = (Button) findViewById(R.id.button);
        button.setOnClickListener(new OnClickListener() {
            public void onClick(View v) {
                // Perform action on clicks
                Toast.makeText(HelloFormStuffActivity.this, "Beep Bop", Toast.LENGTH_SHORT).show();
            }
        });
        
        final EditText edittext = (EditText) findViewById(R.id.edittext);
        edittext.setOnKeyListener(new OnKeyListener() {
            public boolean onKey(View v, int keyCode, KeyEvent event) {
                // If the event is a key-down event on the "enter" button
                if ((event.getAction() == KeyEvent.ACTION_DOWN) &&
                    (keyCode == KeyEvent.KEYCODE_ENTER)) {
                  // Perform action on key press
                  Toast.makeText(HelloFormStuffActivity.this, edittext.getText(), Toast.LENGTH_SHORT).show();
                  return true;
                }
                return false;
            }
        });
        
        final CheckBox checkbox = (CheckBox) findViewById(R.id.checkbox);
        checkbox.setOnClickListener(new OnClickListener() {
            public void onClick(View v) {
                // Perform action on clicks, depending on whether it's now checked
                if (((CheckBox) v).isChecked()) {
                    Toast.makeText(HelloFormStuffActivity.this, "Selected", Toast.LENGTH_SHORT).show();
                } else {
                    Toast.makeText(HelloFormStuffActivity.this, "Not selected", Toast.LENGTH_SHORT).show();
                }
            }
        });
        
        final RadioButton radio_red = (RadioButton) findViewById(R.id.radio_red);
        final RadioButton radio_blue = (RadioButton) findViewById(R.id.radio_blue);
        radio_red.setOnClickListener(radio_listener);
        radio_blue.setOnClickListener(radio_listener);
        
        final ToggleButton togglebutton = (ToggleButton) findViewById(R.id.togglebutton);
        togglebutton.setOnClickListener(new OnClickListener() {
            public void onClick(View v) {
                // Perform action on clicks
                if (togglebutton.isChecked()) {
                    Toast.makeText(HelloFormStuffActivity.this, "Checked", Toast.LENGTH_SHORT).show();
                } else {
                    Toast.makeText(HelloFormStuffActivity.this, "Not checked", Toast.LENGTH_SHORT).show();
                }
            }
        });
    }
    
    private OnClickListener radio_listener = new OnClickListener() {
        public void onClick(View v) {
            // Perform action on clicks
            RadioButton rb = (RadioButton) v;
            Toast.makeText(HelloFormStuffActivity.this, rb.getText(), Toast.LENGTH_SHORT).show();
        }
    };
}
実行します。
res/layout/main.xmlを開き、以下のように変更します。
<?xml version="1.0" encoding="utf-8"?>
<LinearLayout xmlns:android="http://schemas.android.com/apk/res/android"
    android:layout_width="match_parent"
    android:layout_height="match_parent"
    android:orientation="vertical" >
    
    <Button
        android:id="@+id/button"
        android:layout_width="wrap_content"
        android:layout_height="wrap_content"
        android:padding="10dp"
        android:background="@drawable/android_button" />

    <EditText
        android:id="@+id/edittext"
        android:layout_width="match_parent"
        android:layout_height="wrap_content"
        android:inputType="text" />
    
    <CheckBox android:id="@+id/checkbox"
        android:layout_width="wrap_content"
        android:layout_height="wrap_content"
        android:text="@string/checkbox_label" />

    <RadioGroup
        android:layout_width="match_parent"
        android:layout_height="wrap_content"
        android:orientation="vertical">
        <RadioButton android:id="@+id/radio_red"
            android:layout_width="wrap_content"
            android:layout_height="wrap_content"
            android:text="@string/red" />
        <RadioButton android:id="@+id/radio_blue"
            android:layout_width="wrap_content"
            android:layout_height="wrap_content"
            android:text="@string/blue" />
    </RadioGroup>

    <ToggleButton android:id="@+id/togglebutton"
        android:layout_width="wrap_content"
        android:layout_height="wrap_content"
        android:textOn="@string/vibrate_on"
        android:textOff="@string/vibrate_off"/>
    
    <RatingBar android:id="@+id/ratingbar"
        android:layout_width="wrap_content"
        android:layout_height="wrap_content"
        android:numStars="5"
        android:stepSize="1.0"/>

</LinearLayout>
HelloFormStuffActivity.javaを開き、以下のように変更します。
package jp.blogspot.logroid.helloFormStuff;

import android.app.Activity;
import android.os.Bundle;
import android.view.KeyEvent;
import android.view.View;
import android.view.View.OnClickListener;
import android.view.View.OnKeyListener;
import android.widget.Button;
import android.widget.CheckBox;
import android.widget.EditText;
import android.widget.RadioButton;
import android.widget.RatingBar;
import android.widget.RatingBar.OnRatingBarChangeListener;
import android.widget.Toast;
import android.widget.ToggleButton;

public class HelloFormStuffActivity extends Activity {
    /** Called when the activity is first created. */
    @Override
    public void onCreate(Bundle savedInstanceState) {
        super.onCreate(savedInstanceState);
        setContentView(R.layout.main);
        
        final Button button = (Button) findViewById(R.id.button);
        button.setOnClickListener(new OnClickListener() {
            public void onClick(View v) {
                // Perform action on clicks
                Toast.makeText(HelloFormStuffActivity.this, "Beep Bop", Toast.LENGTH_SHORT).show();
            }
        });
        
        final EditText edittext = (EditText) findViewById(R.id.edittext);
        edittext.setOnKeyListener(new OnKeyListener() {
            public boolean onKey(View v, int keyCode, KeyEvent event) {
                // If the event is a key-down event on the "enter" button
                if ((event.getAction() == KeyEvent.ACTION_DOWN) &&
                    (keyCode == KeyEvent.KEYCODE_ENTER)) {
                  // Perform action on key press
                  Toast.makeText(HelloFormStuffActivity.this, edittext.getText(), Toast.LENGTH_SHORT).show();
                  return true;
                }
                return false;
            }
        });
        
        final CheckBox checkbox = (CheckBox) findViewById(R.id.checkbox);
        checkbox.setOnClickListener(new OnClickListener() {
            public void onClick(View v) {
                // Perform action on clicks, depending on whether it's now checked
                if (((CheckBox) v).isChecked()) {
                    Toast.makeText(HelloFormStuffActivity.this, "Selected", Toast.LENGTH_SHORT).show();
                } else {
                    Toast.makeText(HelloFormStuffActivity.this, "Not selected", Toast.LENGTH_SHORT).show();
                }
            }
        });
        
        final RadioButton radio_red = (RadioButton) findViewById(R.id.radio_red);
        final RadioButton radio_blue = (RadioButton) findViewById(R.id.radio_blue);
        radio_red.setOnClickListener(radio_listener);
        radio_blue.setOnClickListener(radio_listener);
        
        final ToggleButton togglebutton = (ToggleButton) findViewById(R.id.togglebutton);
        togglebutton.setOnClickListener(new OnClickListener() {
            public void onClick(View v) {
                // Perform action on clicks
                if (togglebutton.isChecked()) {
                    Toast.makeText(HelloFormStuffActivity.this, "Checked", Toast.LENGTH_SHORT).show();
                } else {
                    Toast.makeText(HelloFormStuffActivity.this, "Not checked", Toast.LENGTH_SHORT).show();
                }
            }
        });
        
        final RatingBar ratingbar = (RatingBar) findViewById(R.id.ratingbar);
        ratingbar.setOnRatingBarChangeListener(new OnRatingBarChangeListener() {
            public void onRatingChanged(RatingBar ratingBar, float rating, boolean fromUser) {
                Toast.makeText(HelloFormStuffActivity.this, "New Rating: " + rating, Toast.LENGTH_SHORT).show();
            }
        });
    }
    
    private OnClickListener radio_listener = new OnClickListener() {
        public void onClick(View v) {
            // Perform action on clicks
            RadioButton rb = (RadioButton) v;
            Toast.makeText(HelloFormStuffActivity.this, rb.getText(), Toast.LENGTH_SHORT).show();
        }
    };
}
実行します。
今回出てきたキーワードについて解説。
getAction
イベントタイプを取得する。
setOnKeyListener
キー入力があった際のイベントリスナ登録
setOnRatingBarChangeListener
レート変更があった際のイベントリスナ登録
関連記事

2012年4月19日木曜日

Android Maps API Key 取得方法

Google MapsをAndroidアプリケーション等から利用する場合、API Keyが必要になります。
ここでは、API Keyの取得手順を紹介します。

API Key取得 前提条件

  • Googleアカウントを取得済みであること
  • Java Runtime Environment (JRE)をインストール済みであること
  • Android SDKをインストール済みであること

取得手順

ここでは、デバッグ用のAPI Keyを取得する手順を例としています。
公開用のAPI Keyを取得する場合は、必要に合わせkeystoreファイルのパスを変更してください。
  1. コマンドプロンプトを起動し、JREに含まれるkeytoolにパスが通っているか確認する。
    >keytool -help
    ヘルプが表示されればパスが通っているという事になる。
  2. keystoreファイルのフィンガープリントを取得します
    >keytool -v -list -keystore "%USERPROFILE%\.android\debug.keystore"
    キーストアのパスワードを入力してください:
    
    *****************警告 警告 警告*****************
    *キーストアに保存された情報の整合性は*
    *検証されていません。整合性を検証するには*
    *キーストアのパスワードを入力する必要があります。*
    *****************警告 警告 警告*****************
    
    キーストアのタイプ: JKS
    キーストア・プロバイダ: SUN
    
    キーストアには1エントリが含まれます
    
    別名: androiddebugkey
    作成日: 2012/01/21
    エントリ・タイプ: PrivateKeyEntry
    証明書チェーンの長さ: 1
    証明書[1]:
    所有者: CN=Android Debug, O=Android, C=US
    発行者: CN=Android Debug, O=Android, C=US
    シリアル番号: 538c7f6
    有効期間の開始日: Sat Jan 21 22:33:16 JST 2012終了日: Mon Jan 13 22:33:16 JST 20
    42
    証明書のフィンガプリント:
             MD5:  **:**:**:**:**:**:**:**:**:**:**:**:**:**:**:**
             SHA1: **:**:**:**:**:**:**:**:**:**:**:**:**:**:**:**:**:**:**:**
             SHA256: **:**:**:**:**:**:**:**:**:**:**:**:**:**:**:**:**:**:**:**:**:**:**:**:**:**:**:**:**:**:**:**
             署名アルゴリズム名: SHA256withRSA
             バージョン: 3
    
    拡張:
    
    #1: ObjectId: 2.5.29.14 Criticality=false
    SubjectKeyIdentifier [
    KeyIdentifier [
    0000: C2 AE C8 B6 9C 42 0E 76   CF 03 2B 03 C0 38 D3 50  .....B.v..+..8.P
    0010: A0 ED 47 69                                        ..Gi
    ]
    ]


    *******************************************
    *******************************************
    パスワードの入力が求められますが、そのままEnterで進めます。
  3. フィンガープリントから、API Keyを取得します。
    以下のページのMy certificate's MD5 fingerprint:に 2. で取得したMD5フィンガープリントを入力し、I have read and agree with the terms and conditionsにチェックを入れ、Generate API Keyをクリックします。
    Maps API Key Signup - Google Projects for Android
    http://code.google.com/intl/ja/android/add-ons/google-apis/maps-api-signup.html
  4. キーが表示されます。
    Android Maps API Key 取得方法
関連記事